Hephaestus - God of Technology, Blacksmiths, Craftsmen, Artisans and Volcanoes Fire.
In the name of Hephaestus we started the blog.
We provide the best " how to do " items . So just scroll down and do that thing....
Saturday, 12 April 2014
How to create Partition in Hard disks ( With Pictures )
For many reasons there is need to partition the hard disk .Follow the following steps
Step 1 :
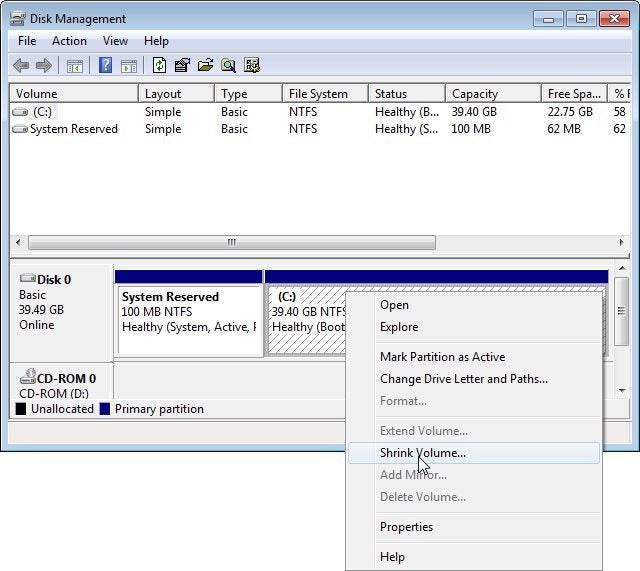
In Windows 7, click Start, or inWindows 8, go to the Search charm. Either way, type partitions (and yes, you need the s), then select Create and format hard disk partitions.
The Disk Management program will come up. To shrink the existing partition, right-click it and select Shrink Volume.
Step 2 :
Then wait. It may take a while Eventually, a dialog box will ask how
much you want the partition shrunk. The default number will be the
maximum available.
And therein lies Disk Management's problem. If the current partition has
228GB free drive, you should be able to shrink it by anything less than
228GB. But Disk Management may not let you shrink it anywhere near that
much. If the program won't allow you to shrink the partition as much as
you want, skip to the last paragraph.
Your drive may have 23GB of free space, but Disk Management may only let you have 12GB of that.Step 3:
Let's assume that Disk Management allows you to shrink the partition sufficiently. In that case, set the right size, click the Shrink button, and follow the prompts. When the resizing is done, right-click the physical drive's unallocated space and select Simple New Volume.
Step 4 :
Then follow the wizard.
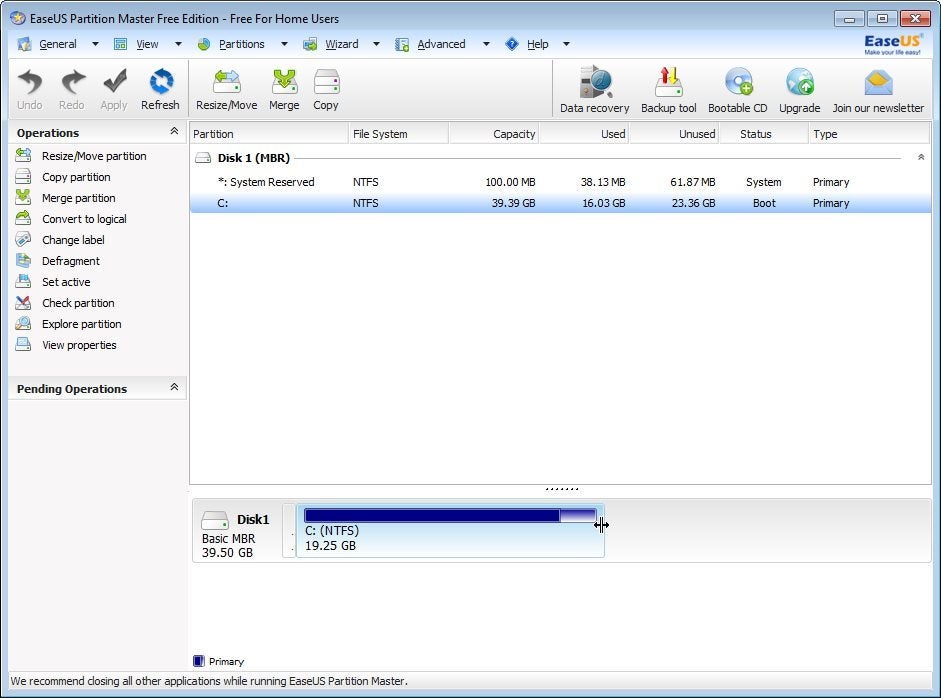
But if Disk Management can't shrink the partition as far as you want it
to, it's time to go with a third-party program. I recommend EASEUS Partition Master Free. ( google it ! )
It's simple and, as the name implies, free. And it can shrink your
partition until there's almost no empty room. But when you install it,
select the Custom Install option to avoid installing extra, unwanted programs.
If you have any problem free feel to ask or comment it


No comments:
Post a Comment